 |
|
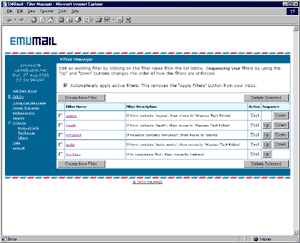
Filters
You can access Filters by expanding Options in the side menu and clicking on "Filters", or by clicking on "Options" from the same menu, and proceeding to Filters. Filters allow you to automatically screen and organize your incoming email. Filters can also be applied to messages you have already received and read. |
|
| Create New Filter: |

Click "Create New Filter" to bring up the Filter Editor window. Enter a name for your filter, and click "Active" if you want to activate the filter as soon as you save it. Select what you want the filter to look for (contains or doesn't contain) and in what part of the message (sender, recipient, subject, body, headers, headers and body) and type in the actual text it should look for. Then, select what the filter would do with a message that matched your specified criteria (move to folder "folder name"). Click on "Save Changes" to save the filter. |
Automatically apply
active filters: |
If you would like the filters you create to be applied to incoming mail automatically, click this box. Otherwise, you will see an "Apply Filters" button in your Message Index. If the filters are not applied automatically, you can apply them by clicking "Apply Filters" at any time. If you want to apply filters by clicking the "Apply Filters" button, they will not be applied automatically to incoming mail. |
| Edit a Filter: |
To edit a filter, click on its name to bring up the Filter Editor window. |
| Delete Selected: |
Check the box to the left of the filter you want to delete and click on "Delete Selected" to delete it. You can delete multiple filters at one time by selecting more than one check box. |
| Up: |
Filters are applied in order, starting from the top-most filter, with the inactive filters being ignored. Click "Up" to move the filter higher in the sequence of filters. |
| Down: |
Filters are applied in order, starting from the top-most filter, with the inactive filters being ignored. Click "Down" to move the filter lower in the sequence of filters. |
|
|
|